The following sections provide an overview of the different configuration panels available within the Java Toolbox Web-GUI. Navigate with the mouse pointer to a symbol at the top of the Web-GUI screen and click to open the panel selected. When a panel is opened in the Web-GUI, the text below the symbol at the top of the screen is highlighted (see Master in the following image).

Web-GUI Symbols for Opening Panels
The most recently opened panel is displayed underneath the Master panel by default. Click the Maximize/Minimize  symbol to view a panel in full-screen mode, or click to minimize back to the default panel size.
 Master Panel to Load Programs and Connect Audio Streams
|
|
Feature
|
Description
|
1
|
Input/Output PPMs
|
6 PPM meters to display audio levels for inputs and outputs
|
2
|
Connections
|
Provides a summary of connection details and audio streams
|
3
|
Lock symbol
|
Symbol indicates the currently loaded program is locked
|
4
|
Maximize/Minimize
|
Click to maximize a panel to view it in full-screen mode, or click to minimize back to the default panel size
|
5
|
Close button
|
Click to close the Master panel
|
6
|
Connect button
|
Click Connect to connect all audio streams configured within the currently selected program in the Programs list; this button also loads the program currently selected in the Programs list
|
7
|
Programs list
|
Lists all configured programs which have been added into the codec. Click to select a program before loading or connecting
|
8
|
Load button
|
Click to load the program currently selected in the Programs list
|
9
|
Renegotiate Bit Rate
|
Click the drop-down menu to select a connection bit rate for a connection. Note: this setting is only visible when you have selected an audio stream connection
|
10
|
Disconnect button
|
Click to disconnect the currently selected audio stream or a specific connection. Note: this button becomes a Connect or Unload button when all audio streams are disconnected
|
|
Programs Panel for Connection Configuration
|
Feature
|
Description
|
1
|
Programs List
|
Displays all programs in the codec
|
2
|
New Program button
|
Click to add a new program
|
3
|
Program Name
|
The name of the currently selected program in the panel
|
4
|
Edit Name
|
Click to edit the name of the currently selected program
|
5
|
Audio Stream overview
|
Click the blue arrows  to expand audio stream and connection information; click the Edit symbol to expand audio stream and connection information; click the Edit symbol  to adjust program settings. This panel displays the program wizard when creating a new program to adjust program settings. This panel displays the program wizard when creating a new program
|
6
|
Delete Program
|
Click to delete the currently selected program (Note: Ensure the program is not loaded or the delete function will not work)
|
7
|
Maximize/Minimize
|
Click to maximize a panel to view it in full-screen mode, or click to minimize back to the default panel size
|
8
|
Close button
|
Click to close the Connect panel
|
|
Inputs Panel for Input Adjustments

|
Important Note: Tieline codecs have different input configurations, therefore the image shown may not reflect the number of inputs displayed in your codec Web-GUI.
|
|
Feature
|
Description
|
1
|
Channel ON/OFF Buttons
|
Click to turn each channel ON or OFF
|
2
|
Reference levels menu
|
Click the drop-down arrow to select the codec input reference level (default setting Auto)
|
3
|
Lock Button
|
Click to lock all Input panel settings (greys out when locked)
|
4
|
View local
|
Click to view local codec inputs (default)
|
5
|
Settings button
|
Click to adjust input name, type, gain, IGC, phantom on/off, cue/talkback, polarity inversion and on/off as cough button.
|
6
|
Maximize/Minimize
|
Click to maximize a panel to view it in full-screen mode, or click to minimize back to the default panel size
|
7
|
Close button
|
Click to close the panel
|
8
|
Analog/AES3/AES42 Indication
|
Indicates whether the codec input is configured for analog or digital audio sources
|
9
|
Input Sliders/Faders
|
Input gain control sliders/faders
|
10
|
Input Gain setting
|
Input gain adjustments in +/- 0.5dB increments
|
11
|
Input PPM meter
|
Input PPM meter
|
|
Statistics Panel for Monitoring Connection Stability
|
Feature
|
Description
|
1
|
Headings
|
Headings for packet arrival statistics available
|
2
|
Connection Statistics
|
Right-click to view audio stream bit-rate, data and jitter buffer statistics
|
3
|
Maximize/Minimize
|
Click to maximize a panel to view it in full-screen mode, or click to minimize back to the default panel size
|
4
|
Close button
|
Click to close the panel
|
|
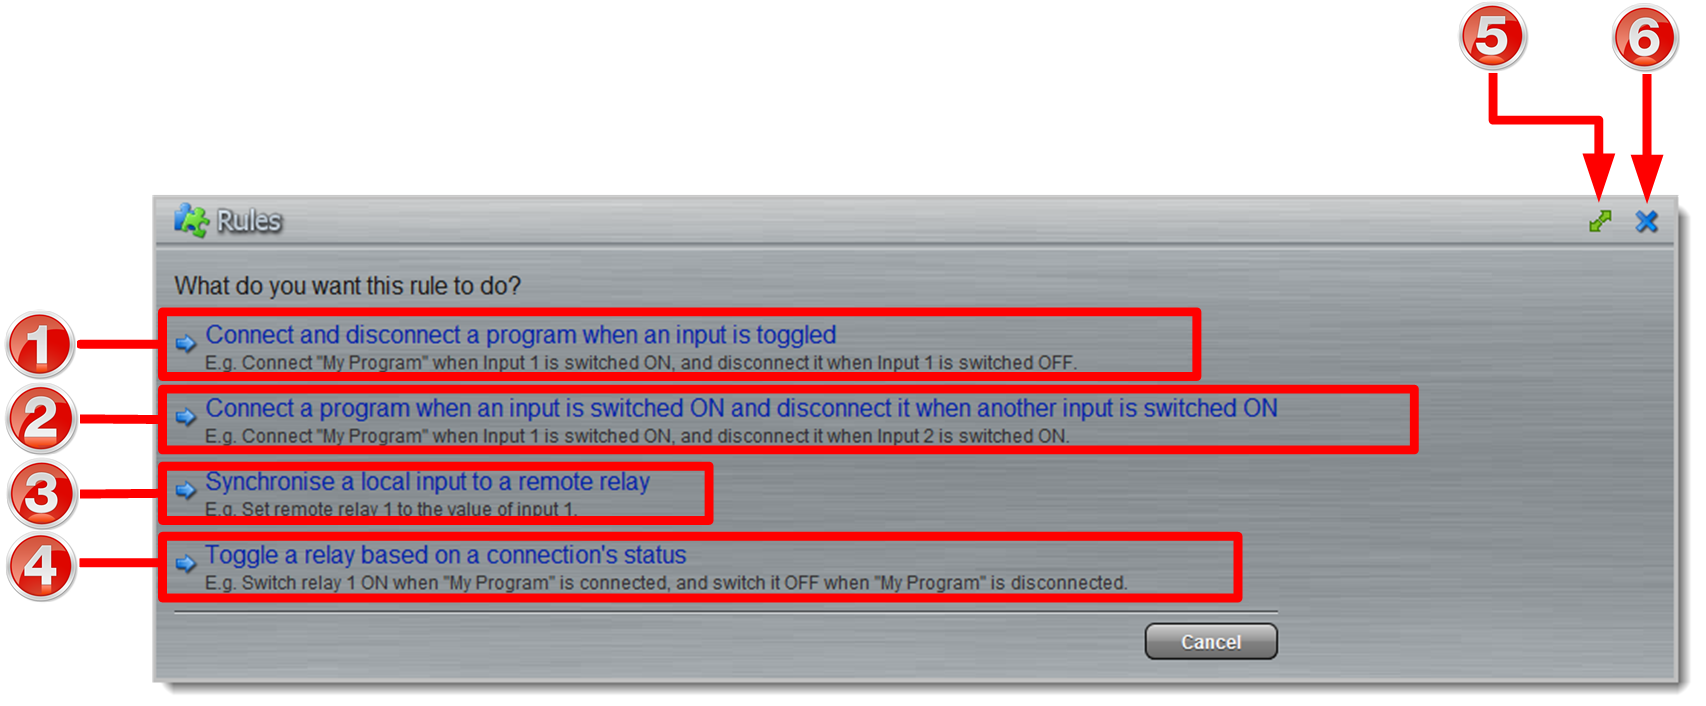
Rules Panel for Creating Relay Activation Rules
|
Rule
|
Description
|
1
|
Connect and disconnect a program when an input is toggled
|
Click to configure Connection and Disconnection by toggling an input
|
2
|
Connect when an input is switched ON; Disconnect when another input is switched ON
|
Click to configure Connection and Disconnection after different relay inputs are switched ON
|
3
|
Synchronize a local relay input with a remote relay output
|
Click to configure a local relay input to synchronize with the state of a remote relay output
|
4
|
Toggle a relay based on a connection's status
|
Click to configure a relay to toggle based on connection status
|
5
|
Maximize/Minimize
|
Click to maximize a panel to view it in full-screen mode, or click to minimize back to the default panel size
|
6
|
Close button
|
Click to close the Rules panel
|
|
|
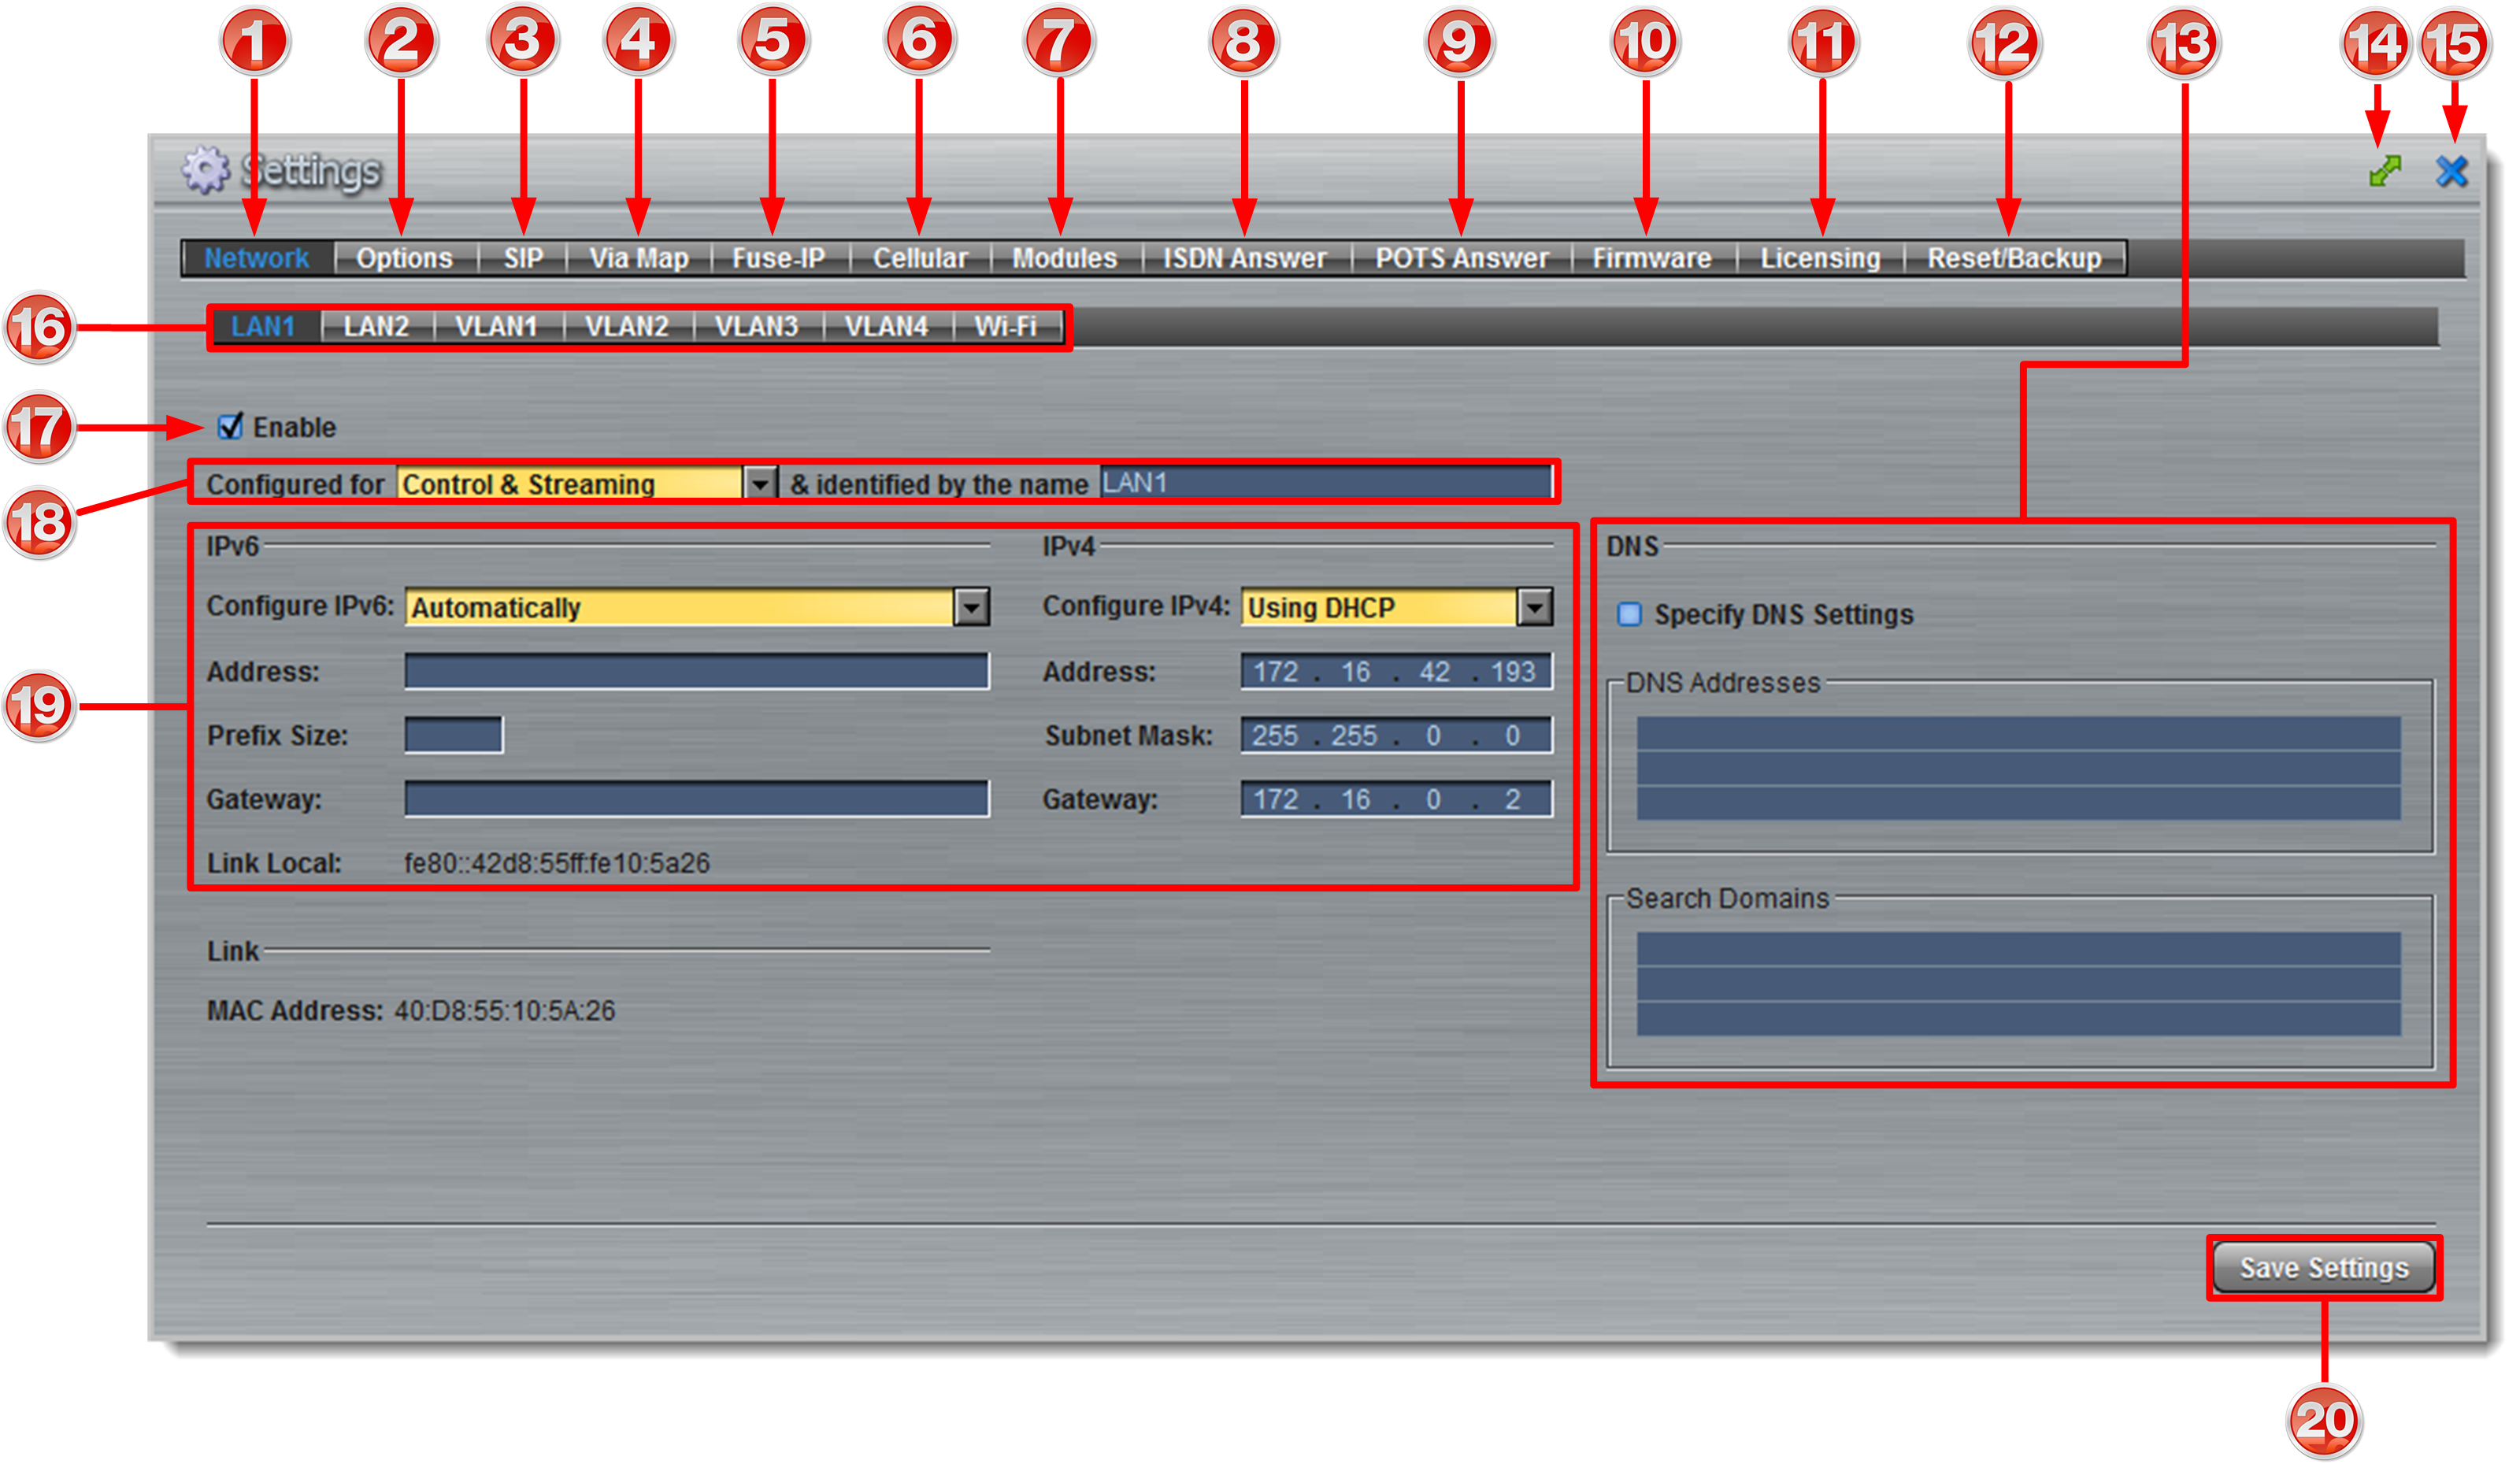
Settings Panel
|
Feature
|
Description
|
1
|
Network tab
|
Click to edit or view codec network configuration settings
|
2
|
Options tab
|
Click to configure RS232 and QoS data settings, lock a loaded user Program and adjust Session Port settings and SNMP. Also enable/disable the HTML Quick Connect GUI
|
3
|
SIP tab
|
Click to edit or view SIP configuration settings
|
4
|
ViA Map
|
Configure default Primary, Secondary and Tertiary interfaces.
|
5
|
Fuse-IP
|
Click to configure Fuse-IP bonding.
|
6
|
Cellular
|
Click to configure cellular modem settings.
|
7
|
Modules tab
|
Click to edit ISDN or POTS hardware module configuration
|
8
|
ISDN Answer tab
|
Click to configure ISDN Answering settings
|
9
|
POTS Answer tab
|
Click to configure POTS Answering settings
|
10
|
Firmware tab
|
Click to view software versions and perform an upgrade
|
11
|
Licensing tab
|
Click to select a license file and install it into the codec
|
12
|
Reset/Backup tab
|
Click to reset codec default settings
|
13
|
DNS Pane
|
Activate to specify DNS addresses and domains to search.
|
14
|
Maximize/Minimize
|
Click to maximize a panel to view it in full-screen mode, or click to minimize back to the default panel size
|
15
|
Close button
|
Click to close the panel
|
16
|
Network Interface
|
Select a network interface to view and adjust configuration options
|
17
|
Enable Interface
|
Select the check-box to enable the selected interface, e.g. LAN1. Deselect the check-box to disable an interface.
|
18
|
Control and/or Streaming config
|
Control and streaming configuration options for the selected network interface
|
19
|
IPv6 and IPv4 details
|
IPv6/IPv4 addressing details and configuration
|
20
|
Save Settings button
|
Saves all configuration settings
|
|
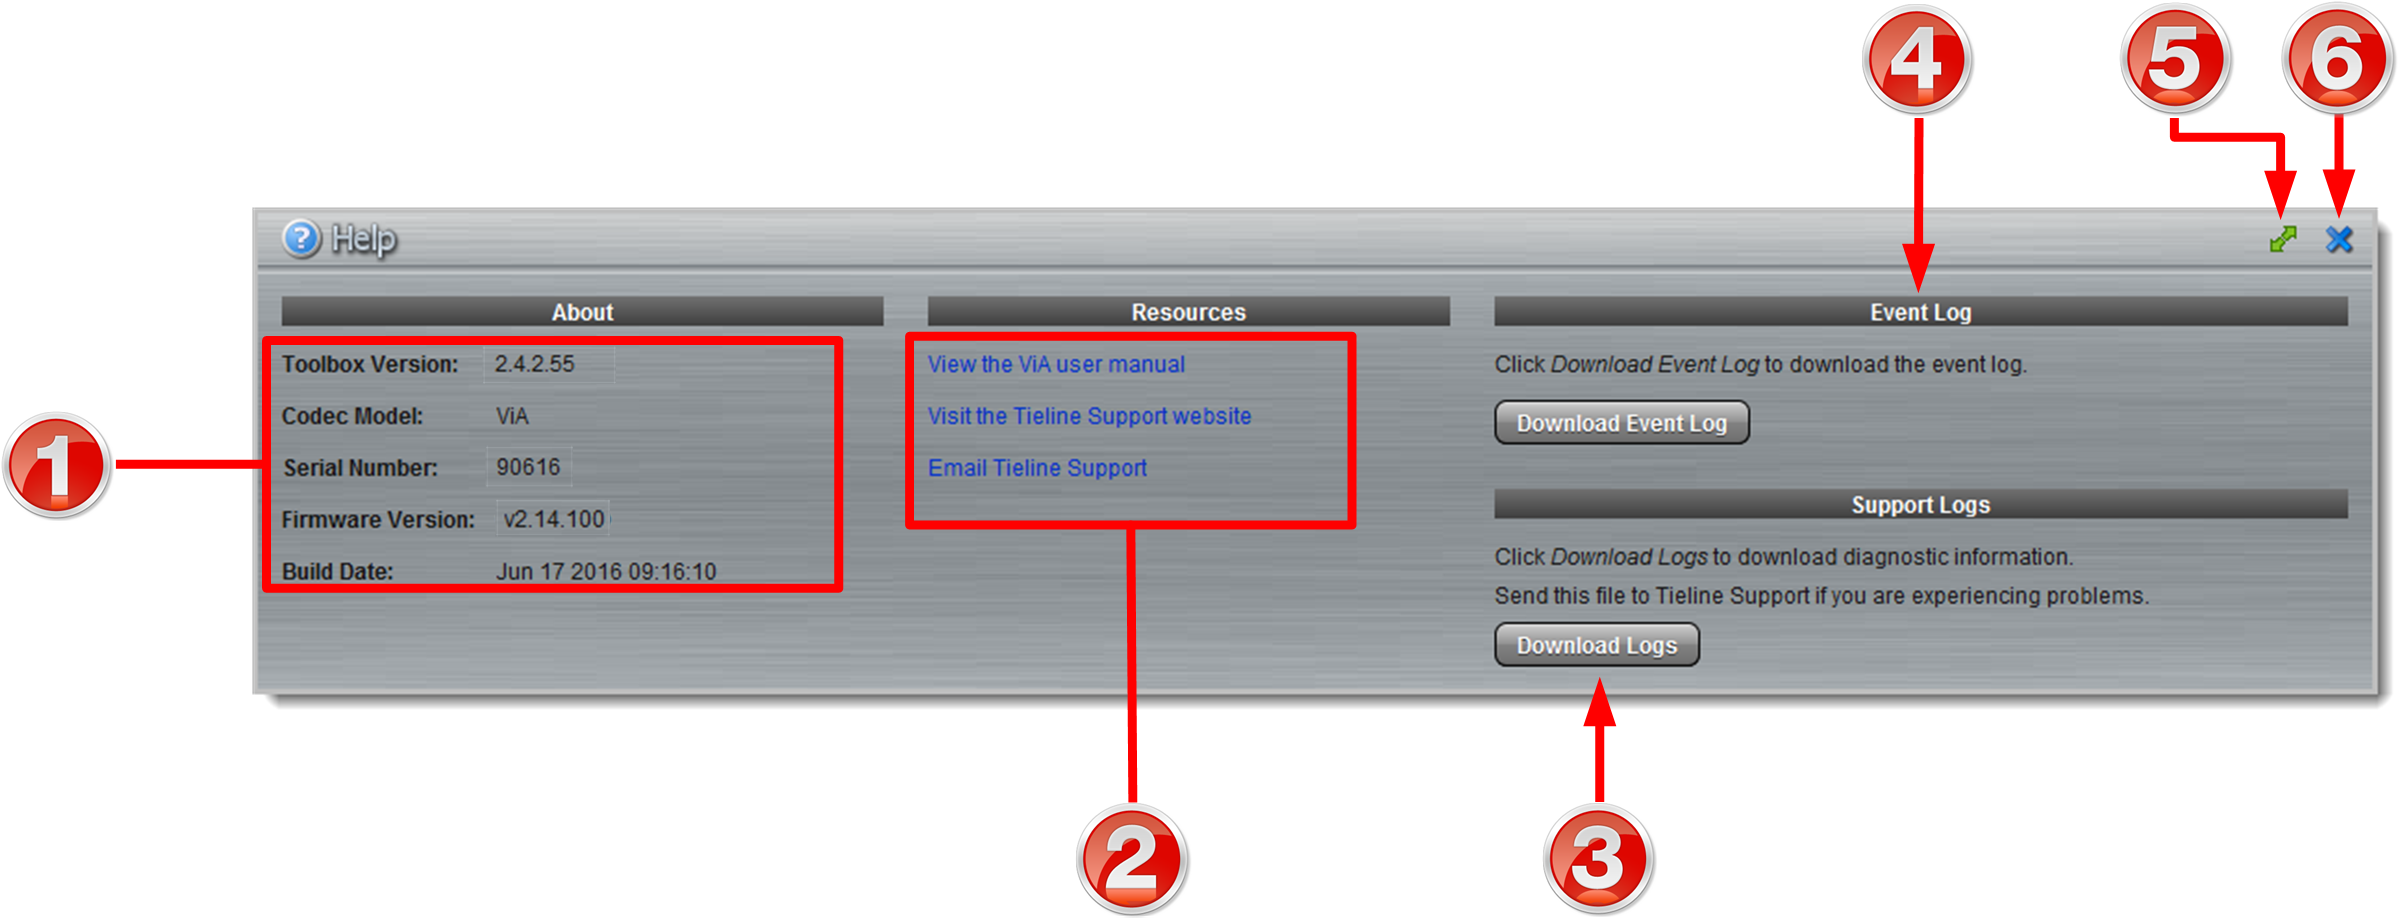
Help Panel
|
Feature
|
Description
|
1
|
About
|
Details of the Toolbox Web-GUI and codec firmware versions, as well as the codec serial number
|
2
|
Resources
|
Links to open the user manual in a new browser, or view support information
|
3
|
Support Logs
|
Click to download diagnostic information that can be sent to Tieline support
|
4
|
Event Logs
|
Click to download user-viewable event logs
|
5
|
Maximize/Minimize
|
Click to maximize a panel to view it in full-screen mode, or click to minimize back to the default panel size
|
6
|
Close button
|
Click to close the Help panel
|
|
Language Selection
The Toolbox Web-GUI offers language support for several languages.
1.Click on the language drop-down menu arrow in the top right-hand corner of the Web-GUI page. 2.Click to select a language.
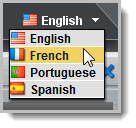
3.Click to refresh your web-browser and display the new language selected. |
|
