
Tieline codecs support the installation of TLS/SSL (hereafter referred to as SSL) security certificates to deliver an additional layer of security when connecting to IP networks. The digital SSL security certificate authenticates the codec and provides more secure encrypted HTTPS browser connections. The codec supports installing a private key as well as an intermediate and SSL certificate.
This section outlines certificate installation, removal and updates. It also outlines how to change the default SSL Port. Note: A single partition FAT32 formatted SD card must be used. To safely remove an SD card after installing certificates, press the HOME ![]() button to return to the Home screen, then tap Settings
button to return to the Home screen, then tap Settings  > System > Safe Eject
  .
.
Certificate Installation
To install certificates purchased from a reputable vendor:
1.Insert an SD card into the SD card slot on the rear panel of the codec. Ensure the Private Key, digital SSL Certificate and Intermediate Certificate (if required) are copied onto the card.
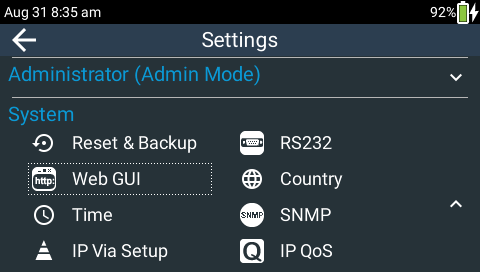
2.Press the HOME ![]() button to return to the Home screen, then tap Settings .
button to return to the Home screen, then tap Settings .
3.Swipe up and tap to expand the System menu, then tap Web GUI  .
.
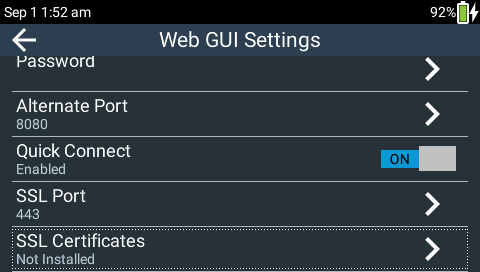
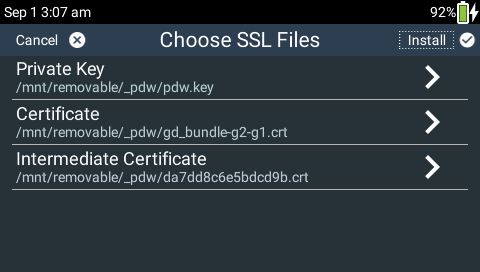
4.Tap SSL Certificates.
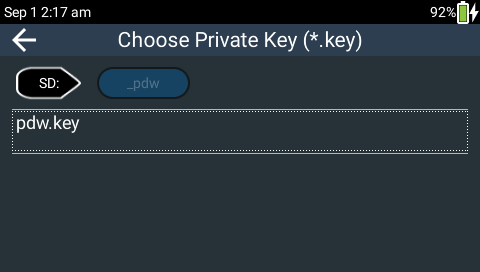
5. Select Private Key and navigate to the correct directory and .key (Private Key) file to install from the SD card. Tap to select it.
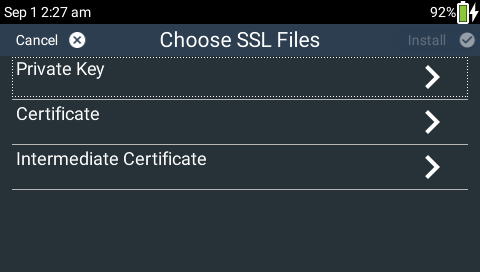
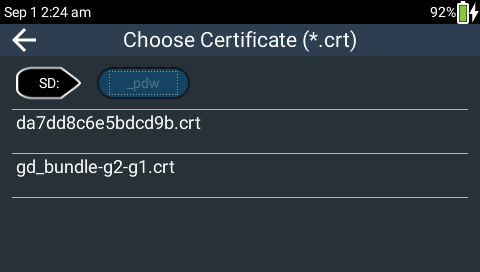
6.Select Certificate and navigate to the SSL Certificate (.crt) file on the SD card. Tap to select it.
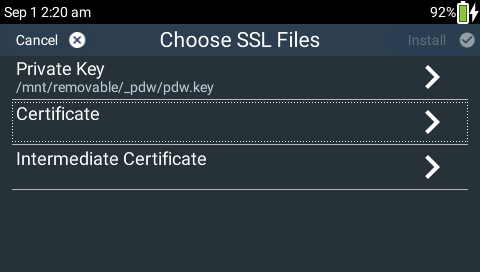
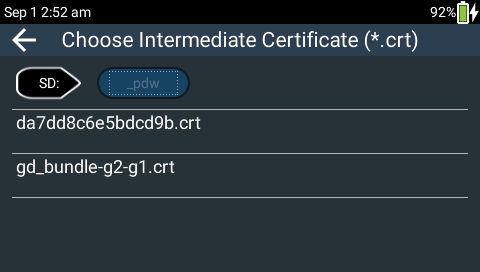
7.If an Intermediate Certificate has been supplied, select Intermediate and navigate to the Intermediate Certificate (.crt) file on the SD card. Tap to select it.
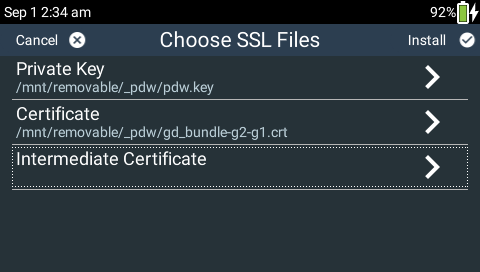
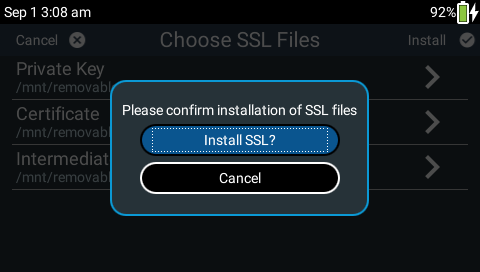
8.After adding the private key, SSL certificate, and intermediate certificate (if supplied), tap Install in the top right-hand corner of the TOUCH SCREEN.
9.Tap Install SSL in the confirmation dialog to complete installation. Installed should now be visible in the SSL Certificates menu.
10.To access a codec via the HTML5 Toolbox Web-GUI in a browser after installing SSL security certificates ensure you type "https://" before the codec IP address. For example, https://172.16.0.100.
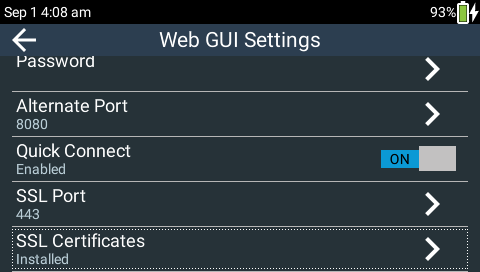
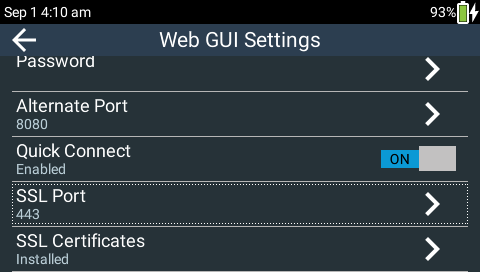
Changing the Default SSL Port
The codec uses the standard TCP port 443 for SSL communications. To adjust this setting navigate to Settings > Web GUI > SSL Port.
Updating and Removing SSL Certificates
To update or remove installed certificates navigate to Settings > Web GUI >SSL Certificates. Tap to either Remove SSL or Update SSL certificates.

Troubleshooting Certificate Installation
If you type "https://" before the codec IP address and can't open the Toolbox web-GUI, first uninstall the certificates and then reinstall them. Also double-check you are installing the correct certificates. If you continue to have issues, contact your certificate vendor to ensure the certificate is valid.
