
Up to 6 SIP accounts can be configured in the codec and registering codecs for SIP connectivity is simple. First, select the SIP server to which you will register your codec. On a LAN this may be your own server, or it could be one of the many internet servers available. We recommend that you use your own SIP server and configure it to use G.711, G.722, MP2 and AAC algorithms. This is because most internet SIP servers are for VoIP phones and are only configured for G.711 and GSM algorithms.
When you register an account with a SIP server you will be provided with:
•Username
•Authorized User
•SIP address
•Domain
•Realm
•Registrar
•Registar port
•Outbound Proxy
•Proxy port
•Password
•Registration Timeout (this shouldn't need to be adjusted from the default setting).
|
Important Notes: •In most situations it is best to configure a SIP account when the codec is configured with a public IP address. •Each SIP account can only be mapped to a single SIP interface, i.e. SIP1 or SIP 2. •Up to 6 SIP accounts can be added to the codec. •To configure a SIP Account using the codec LCD SCREEN see Configuring SIP Accounts. |

Adding a SIP Account
Enter SIP account details and register the account in your codec. Once configured, the codec will contact the SIP server automatically to acknowledge its presence over a wide area network when connected to a public IP address.
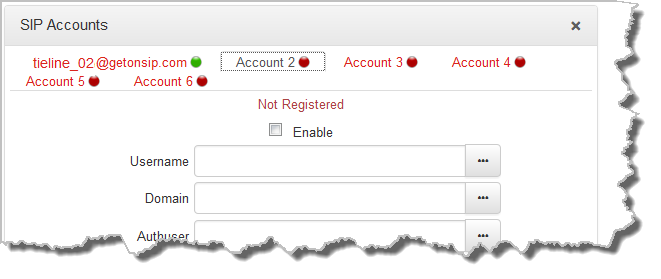
1.Open the HTML5 Toolbox Web-GUI and click Transport and then click SIP Accounts to view and configure SIP account settings.
2.Click to select one of the unused Accounts at the top of the SIP Accounts panel.
3.Enter the SIP account details into the relevant text boxes, including the registration Timeout (which shouldn't need to be adjusted from the default setting). Also ensure a SIP Interface is selected (e.g. SIP1 or SIP2.) The SIP interface contains settings related to ports and the selected Via interface, e.g.LAN. See Configuring SIP Interfaces for more details.
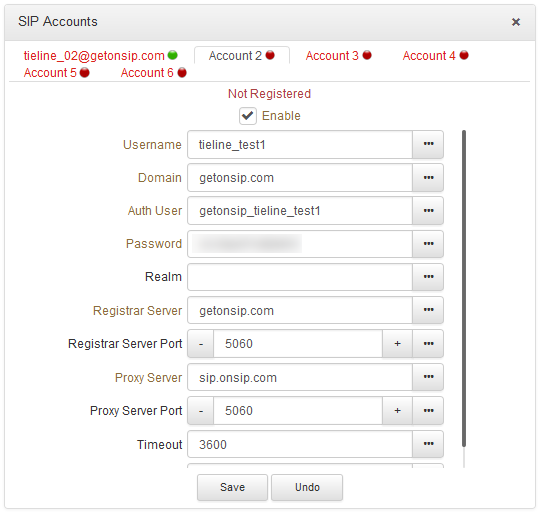
4.Click the Enable check-box at the top of the panel and then click the Save button to register the codec to the server.
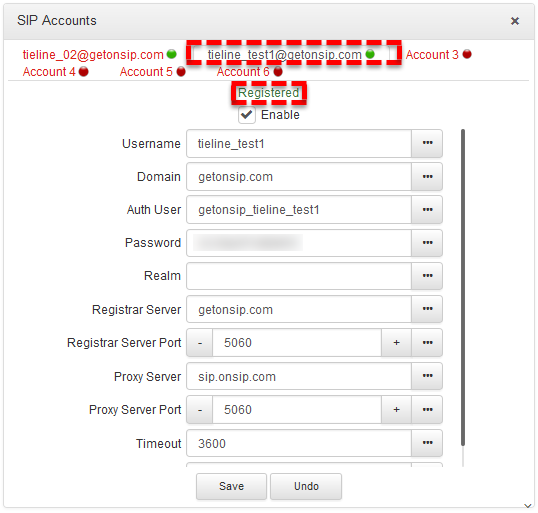
5.If an account is registered successfully, the account registration indicator changes from red to green, and Not Registered (above the Enable check-box) becomes Registered.
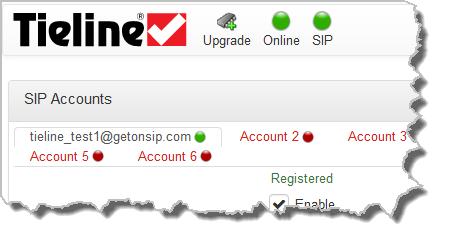
6.In the Toolbox Web-GUI the red SIP indicator adjacent to the codec Online indicator also changes to green when an account is currently registered in the codec and ready to be used when dialing over SIP.
7.Once enabled, the SIP account can be selected when creating a new SIP connection.
|
Important Notes: Some ISPs may block SIP traffic over UDP port 5060. |
Troubleshooting SIP Registration
If a SIP account is not registering successfully please check the following:
1.Confirm all account registration information has been entered correctly.
2.Confirm the SIP interface (SIP1 or SIP2) configured as the Via in the account is enabled.
3.Verify that the Via selection in the SIP1 or SIP2 interface settings corresponds with the network interface being used by the codec to register the account. E.g. LAN1 or a VLAN.
