The following procedure will create a custom peer-to-peer connection program using the codec's TOUCH SCREEN. For IP connections, attach an RJ45 Ethernet cable to one of the LAN ports on the codec's left side panel, or connect to an available Wi-Fi network, or attach a USB modem to USB PORT 1 or USB PORT 2.
|
Important Notes: •See Using the HTML5 Toolbox Web-GUI for details on configuring connections remotely via a computer. Creation of programs is not currently supported in the HTML5 Toolbox Web-GUI. •See Installing the Codec at the Studio for valuable information about installing your codec, negotiating firewalls and port forwarding. •See Tips for Creating Reliable IP Connections for a range of IP information to assist with setting up IP services for your codecs. •See Testing IP Network Connections to learn how you can test and verify the reliability of your IP connection. |

1.Press the HOME ![]() button to return to the Home screen, then tap Dialer
button to return to the Home screen, then tap Dialer  .
.

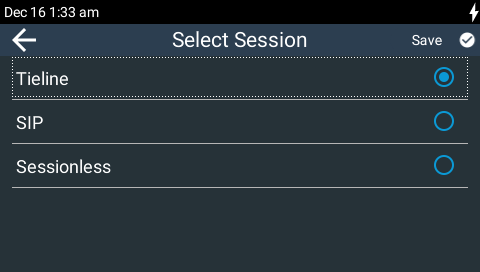
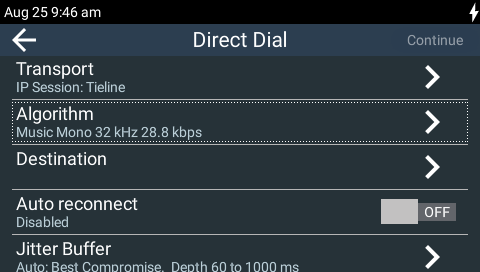
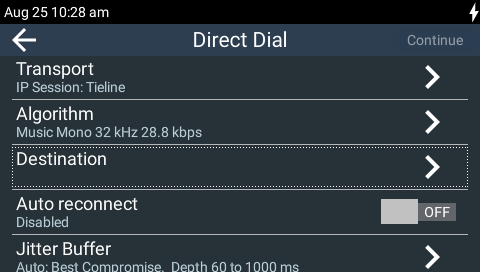
2.Tap Transport and select IP > Tieline if ISDN or POTS is the currently configured transport. Note: Select SIP instead of Tieline session when dialing non-Tieline codecs and see Dialing SIP Peer-to-Peer to configure SIP connections. Select Sessionless to dial a sessionless IP connection over networks supporting this connection method.

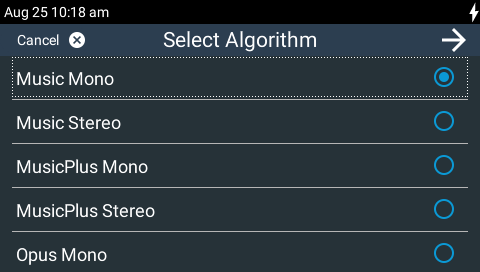
3.Tap Algorithm, then tap to select an algorithm from those listed. Note: In most situations Tieline Music is the best algorithm to use and this is configured by default. See Selecting an Algorithm for more details on algorithm options.
4.Tap to select a sample rate. Note: multiple sample rate options are available for algorithms like MP2, MP3, AAC and aptX Enhanced.
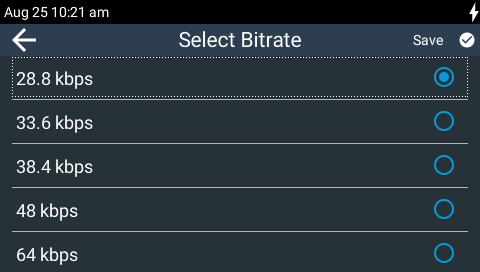
5.Tap to select the initial connection bit-rate.
6.Tap Destination to connect over an IP LAN (using an automatically assigned DHCP IP address).
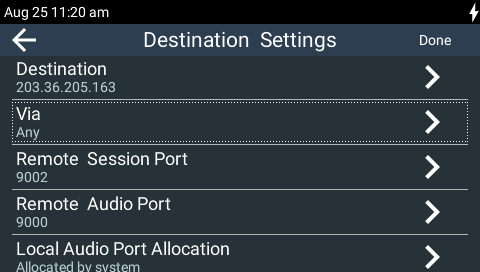
7.Tap Destination to enter the IP address of the codec you are dialing, then tap Done in the top right-hand corner of the TOUCH SCREEN. Note: tap the Dial History  symbol to select a previously dialed number.
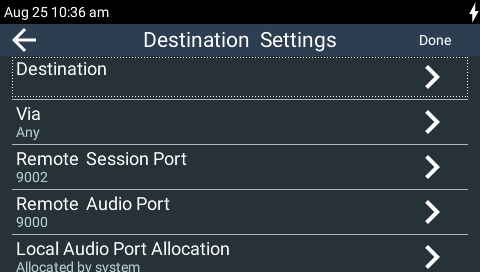

8.Tap Via to select a specific dialing interface in the Select Via screen, or use the default Any setting. Tap Save in the top right-hand corner of the screen to dial using the default Any setting. This setting uses the first available interface based on the following default priorities.
•Primary = LAN1.
•Secondary = LAN2.
•Tertiary = Wi-Fi.
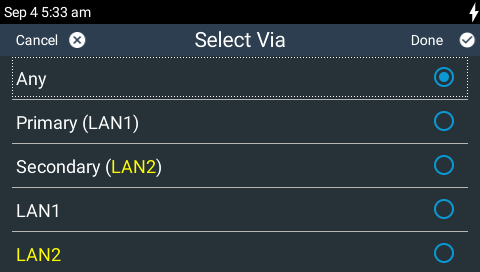
You can also select a specific interface, e.g. Primary, Secondary, LAN1 or LAN2, as displayed in the preceding image. Interfaces are not displayed if they are unavailable, e.g. if Wi-Fi is turned off or there is no cellular modem attached to USB PORT 1 or USB PORT 2. To reconfigure the default Primary, Secondary and Tertiary settings see Configuring Via Interfaces.
9.If required:
•Tap Remote Session Port to enter the session port number of the remote codec (to which you are dialing).
•Tap Remote Audio Port to enter the audio port number of the remote codec (to which you are dialing).
|
Important Note: Sessionless menus provide the ability to change the Remote Audio Port and Local Audio Port setting. |
When these settings are completed tap Done in the top right-hand corner of the TOUCH SCREEN.
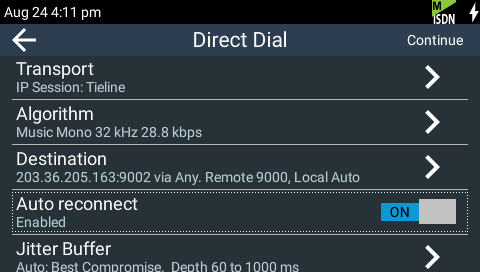
10.Tap to toggle the On/Off button for Auto reconnect if you want the codec to automatically reconnect when the connection is temporarily lost.
11.Tap Jitter Buffer to select a different automatic jitter buffer setting for your connection, or to enter a fixed buffer setting in milliseconds (maximum 5000 ms). The default Auto, Best Compromise setting is a good starting point for most internet connections. Note: The Depth setting allows you to select predetermined minimum and maximum jitter settings within the auto jitter buffer's minimum and maximum jitter limitations. The default setting of 60 to 1000ms is a good starting point for most networks. See Configuring the Jitter Buffer for more details.
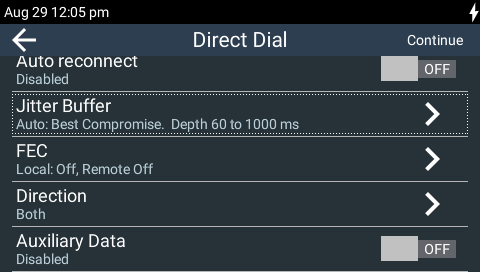
12.Tap FEC to configure local and remote forward error correction settings. See Configuring Forward Error Correction for more details.

13.Tap Direction if you want to save data and configure the codec to either Encode Only or Decode Only. Note: this can be helpful if connection bandwidth is limited.
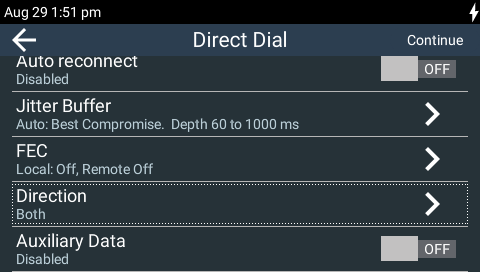
14.Tap to toggle the On/Off button for Auxiliary data to activate CONTROL PORT I/O operation and RS232 data in the codec.
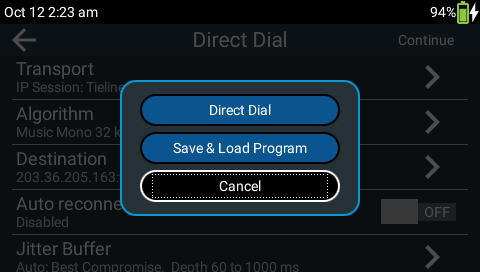
15. When configuration is complete, tap Continue in the top right-hand corner of the TOUCH SCREEN and you will be prompted to save the configuration as a program. Tap Direct Dial in the Save Program dialog to go straight to the Direct Dial Connections screen and make a connection, or tap Save & Load Program to name and save the program. The new program will be loaded automatically after it has been saved.
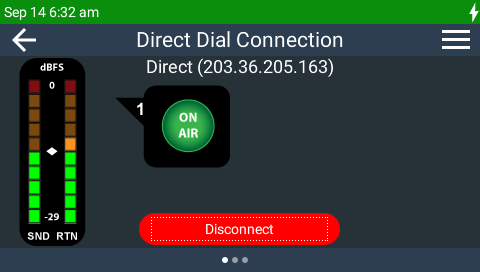
16. Tap Connect or press the CONNECT ![]() button to dial the destination codec. The Status Bar turns green when the codec is connected.
button to dial the destination codec. The Status Bar turns green when the codec is connected.

17.Swipe left once to view Jitter and Send/Return values.
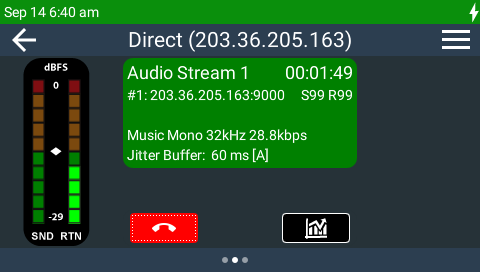
18.Tap the Statistics  button to view connection and packet statistics. Note: Incrementally renegotiate higher connection bit rates by pressing the F2 button and then the NAVIGATE UP
  button while viewing the Statistics screen; for lower bit rates press the F2 button and then the NAVIGATE DOWN
  button.

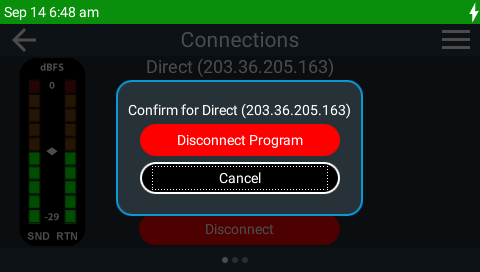
19.Tap Disconnect or press the DISCONNECT ![]() button to hang up the connection.
button to hang up the connection.