Product |
Feature |
Notification |
Gateway 4 |
Programs |
Supports program connections using up to 4 channels of audio |
Gateway 8/16 |
Programs |
Supports program connections using up to 16 channels of audio, depending on codec configuration purchased (between 8 and 16 channels available for purchase) |
The Connections panel allows:
•The configuration of new programs.
•Editing of existing programs.
•Loading and unloading of programs.
The Connections panel delivers the ability to edit destination settings for an audio stream when other audio streams are connected, without unloading a program. Please note: If you need to use an existing program as a template for a new program, or add a custom matrix mix to a program, please use the Program Manager panel to create a program.
Configuring New Programs
|
Important Note: There are some limitations when creating and editing programs using the Connections panel in comparison to using the Program Manager panel. In the Connections panel is not possible to: •Name or rename a program. •Apply a custom matrix. •Manage program level Rules. •Create a program from a copy of an existing program. |

To configure new programs using the Connections panel:
1.Open the HTML5 Toolbox Web-GUI and click Connect in the Menu Bar, then select Connections to launch the Connections panel.
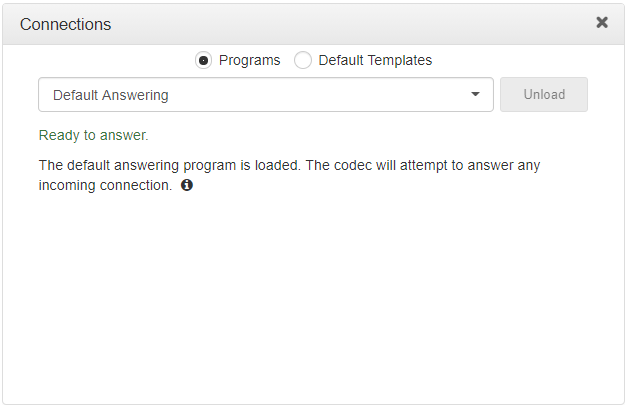
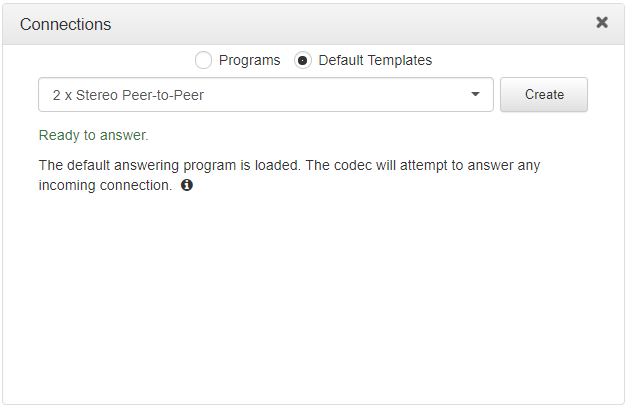
2.Select Default Templates and then click the drop-down arrow to select one of the default templates in the codec. The default templates displayed vary depending on the codec purchased, e.g. Gateway 4, Gateway 8, and Gateway 16. Note: By default User Defined is selected. User Defined programs provide flexibility by allowing configuration of mono, stereo, HTTP encode, and phase-aligned multichannel connections in any order. This is dependent on the number of channels the codec supports. See Configure Dial and Answer Programs for more details about these programs.
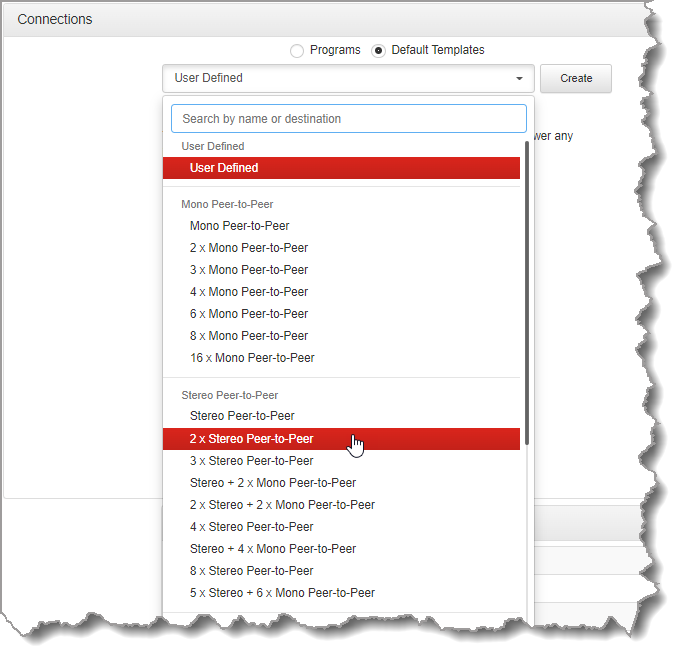
3.Click Create to add the new program using a default template.
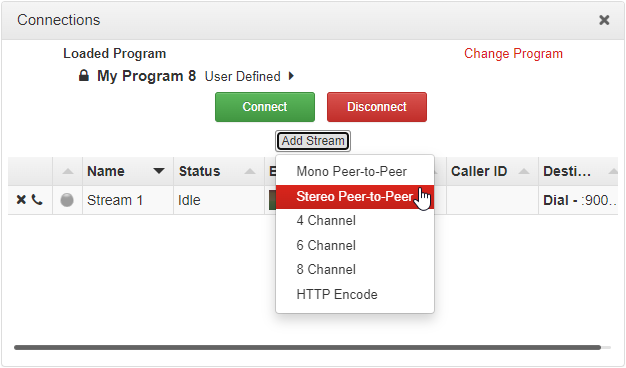
Alternatively, select User Defined and then click Next to add the new User Defined program. Click the Add Stream button to add a new stream, or click the Cross symbol  to the left of a stream to delete an audio stream.
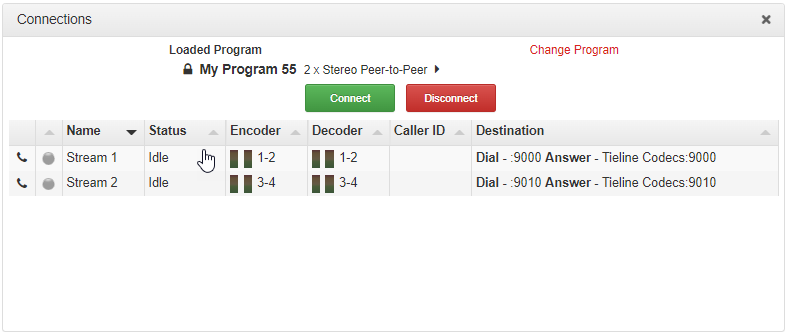
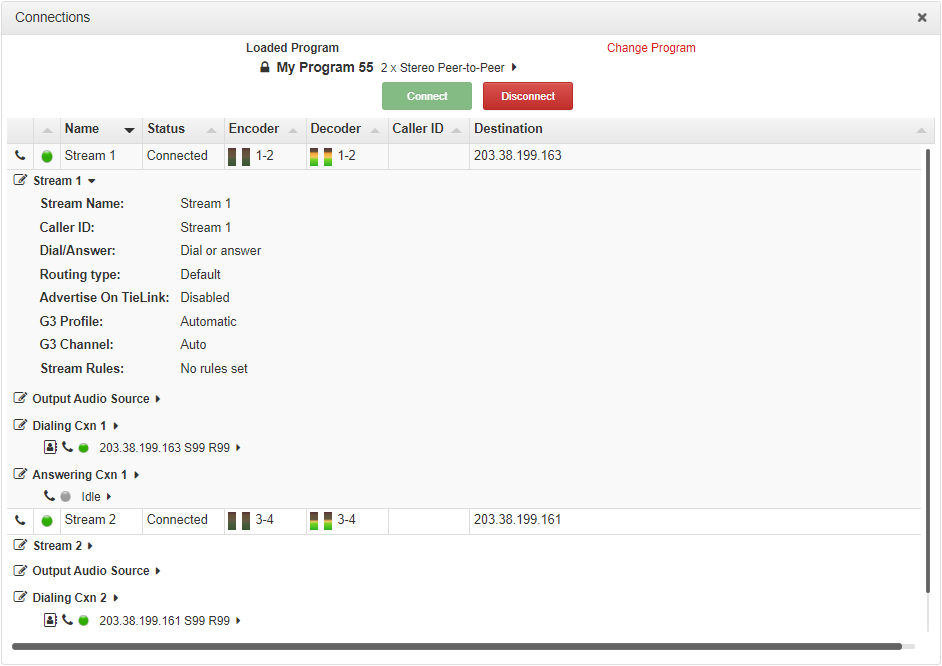
4.Click on a stream to expand it and view default settings.
5.To configure new connection settings, or edit existing connection settings, click the Edit symbol ![]() .
.
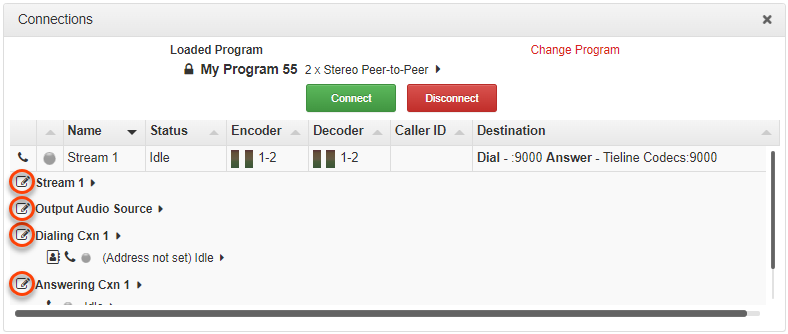
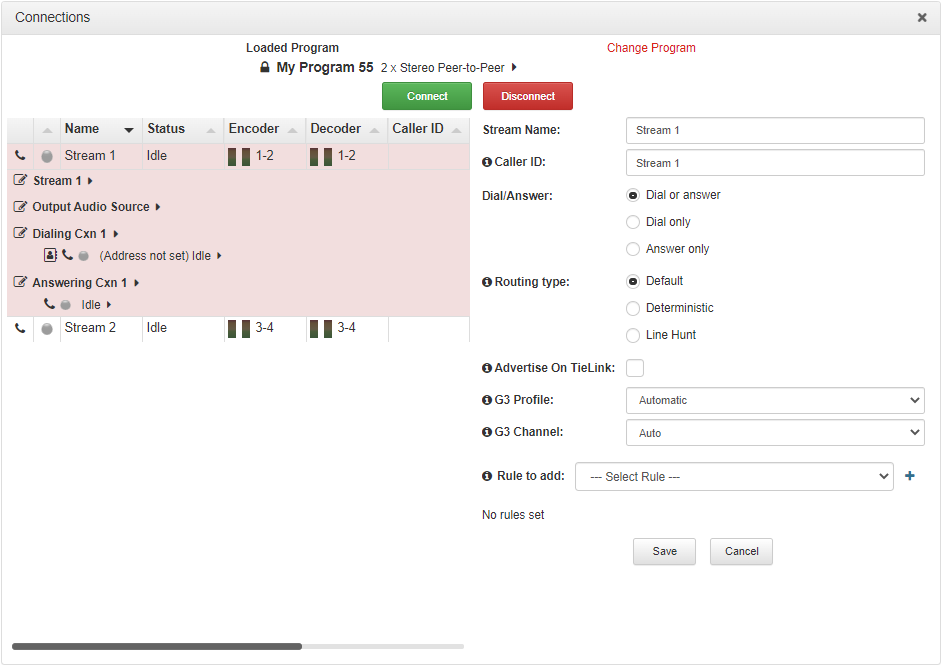
6.The Edit symbol ![]() expands each audio stream and dialing and answering connection to reveal configuration settings. Hover over the Information symbol
expands each audio stream and dialing and answering connection to reveal configuration settings. Hover over the Information symbol ![]() to view details of each configuration setting. Click Save to store changed settings.
to view details of each configuration setting. Click Save to store changed settings.
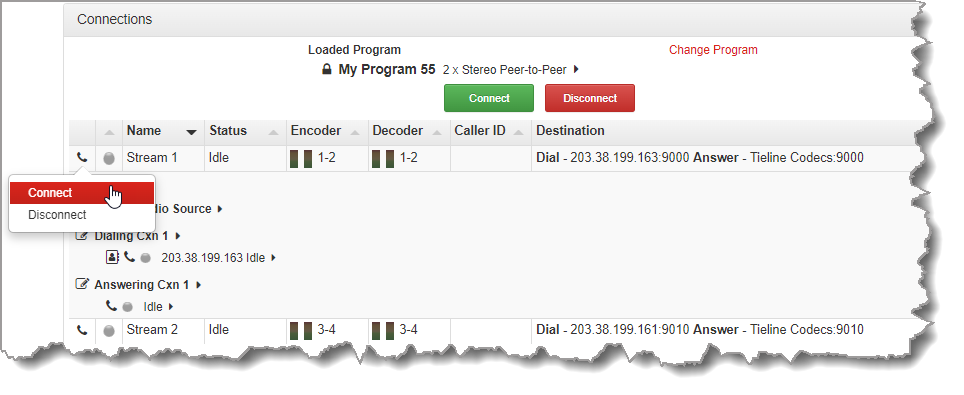
7.To connect an individual connection, click the Connect/Disconnect ![]() symbol for an inactive connection.
symbol for an inactive connection.
8.Click the right-facing arrows ![]() to expand stream settings. Click the down-facing arrows
to expand stream settings. Click the down-facing arrows ![]() to collapse expanded stream settings. Audio stream connections can be connected, disconnected and managed from within the Connections panel.
to collapse expanded stream settings. Audio stream connections can be connected, disconnected and managed from within the Connections panel.
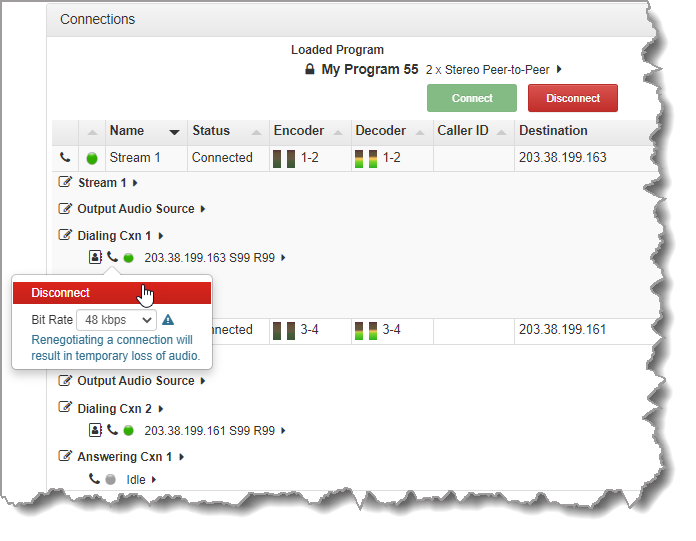
9.Click the Connect/Disconnect ![]() symbol for an active connection and then click the drop-down Bit Rate arrow to select and renegotiate a new bit-rate.
symbol for an active connection and then click the drop-down Bit Rate arrow to select and renegotiate a new bit-rate.
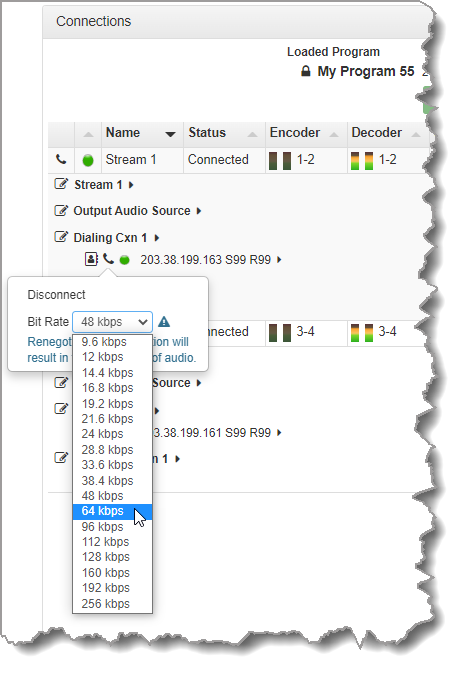
|
Important Notes: •Renegotiation will result in a temporary loss of audio. •It is not possible to renegotiate the connection bit rate of a SIP connection. |
10.To disconnect an individual connection, click the Connect/Disconnect ![]() symbol for an active connection.
symbol for an active connection.