Tieline codecs support the installation of TLS/SSL (hereafter referred to as SSL) security certificates to deliver an additional layer of security when connecting to IP networks. The digital SSL security certificate authenticates the codec and provides more secure encrypted HTTPS browser connections. The codec supports installing a private key as well as an intermediate and SSL certificate.
Certificate Installation
To install certificates purchased from a reputable vendor:
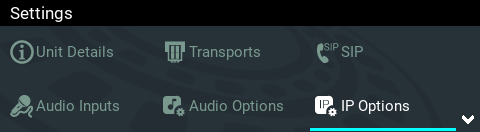
1.Press the SETTINGS  button.
2.Use the navigation buttons to select IP Options and press the  button.
3.Select Web-GUI and press the button.
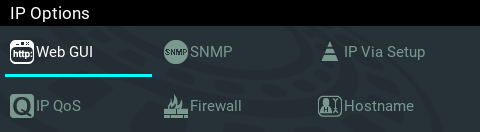
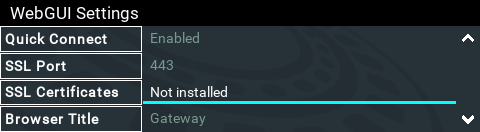
4.Navigate down to SSL Certificates and press the button.
5.Ensure the Private Key, digital SSL Certificate and Intermediate Certificate (if required), are loaded onto an SD card and then insert it into the front panel SD CARD SLOT. Note: A single partition FAT32 formatted SD card must be used.
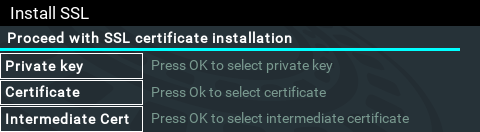
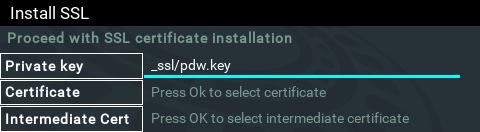
6.Select Private Key and navigate to the correct directory and .key (Private Key) file to install from the SD card and press the button.
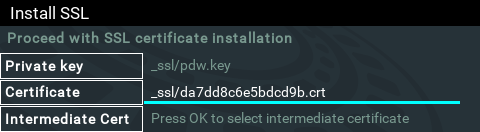
7.Select Certificate and navigate to the SSL Certificate (.crt) file on the SD card and press the button.
8.If an Intermediate Certificate has been supplied, select Intermediate and navigate to the Intermediate Certificate (.crt) file on the SD card and press the button.
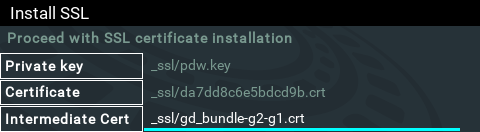
9.After adding the private key, SSL certificate, and intermediate certificate (if supplied), navigate up to Proceed with SSL certificate installation and press the button to install the files.
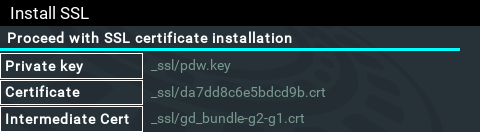
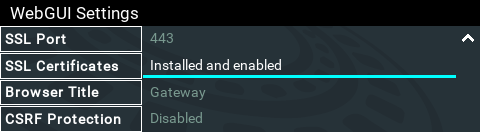
10.The SSL Certificates menu should confirm the files are successfully Installed and enabled.
11.To access a codec via the HTML5 Toolbox Web-GUI in a browser after installing SSL security certificates ensure you type "https://" before the codec IP address. For example, https://172.16.0.100.
Disable or Remove SSL Security Certificates
To disable or remove installed SSL security certificates from a codec:
1.Press the SETTINGS button.
2.Use the navigation buttons to select IP Options and press the button.
3.Select Web-GUI and press the button.
4.Navigate down to SSL Certificates and press the button.
5.Select either Disable or Remove and press the button.
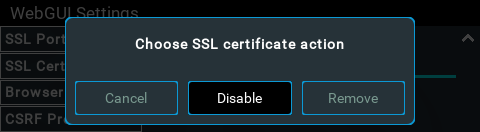
6.Confirm disabling or removal of the SSL files in the onscreen dialog.
7.A dialog confirms the certificates have been disabled or removed successfully.
Changing the Default SSL Port
The codec uses the standard TCP port 443 for SSL communications. The port number can be adjusted by navigating to SETTINGS > IP Options > Web-GUI > SSL Port.
Troubleshooting Certificate Installation
If you type "https://" before the codec IP address and can't open the Toolbox web-GUI, first uninstall the certificates and then reinstall them. Also double-check you are installing the correct certificates. If you continue to have issues, contact your certificate vendor to ensure the certificate is valid.