
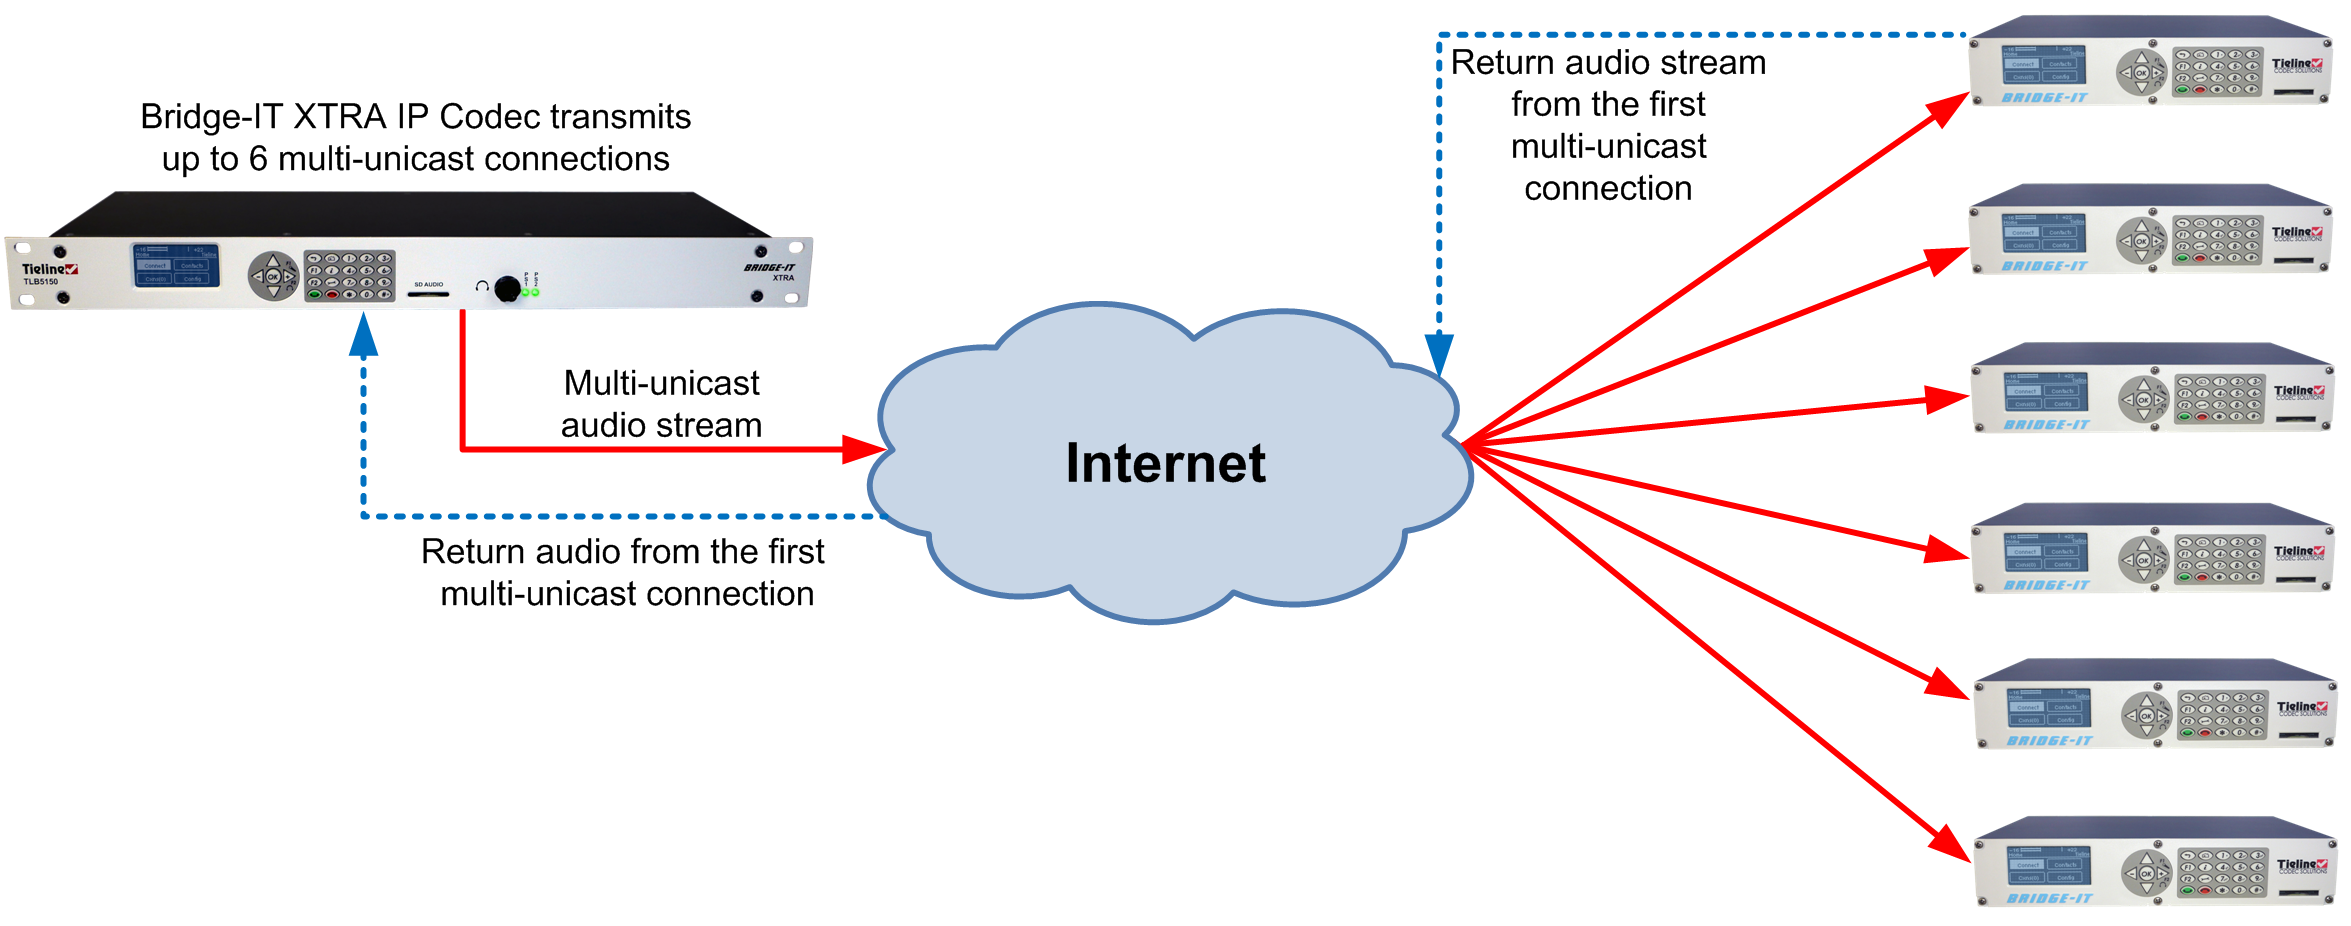
The codec can transmit a mono or stereo multi-unicast audio stream to a maximum of 6 endpoints in total. The first connection in a multi-unicast program is capable of bidirectional audio. Multi-unicast connections can only be created using the ToolBox web-GUI and require a software license which supports multi-unicasting.
Prerequisites:
•Bridge-IT firmware v.1.01.00 r4219 or higher.
•G3 codec firmware v.1.6.56 or higher (if connecting to a G3 codec).
•ToolBox web-GUI v.1.2.2.3 or higher.
•A multi-unicast license installed in the dialing codec.
|
Important Notes: Before you start program configuration please note: •You cannot edit a program when it is currently loaded in the codec. •You can lock a loaded custom program in a codec to ensure the currently loaded program cannot be unloaded by a codec dialing in with a different program type. •If you are dialing to both G3 and Bridge-IT, Merlin or Genie codecs, by default the Audio Reference Level will be configured for the compatibility of the codec dialed first. I.e. if you dial a G3 codec first then the G3 Audio Reference Level will be configured for all connections. •Connections are dial only for multi-unicast programs. •Some drop-down menus and settings may be greyed out intentionally depending on features available. •It is possible to save a program at several points throughout the program wizard and use default settings to save configuration time. The first connection in each multi-unicast stream determines default settings (e.g. algorithm, sample rate, bit rate), for all subsequent connections in that stream, except for dialing settings. •All algorithms are supported for multi-unicast connections, however only one can be used per audio stream. •Forward Error Correction (FEC) is available on multi-unicast connections with Music and MusicPLUS encoding. •Select any algorithm for multi-unicast connections except aptX Enhanced and PCM. •Bidirectional audio is only available on the first connection dialed. •SmartStream PLUS is not available for multi-unicast connections. •Renegotiation of connection bit rates is not possible when connected. •Ensure you have sufficient connection bandwidth at the local codec to support all the connections to which you are connecting. •To learn more about programs see the section titled About Program Dialing. |

Creating a Multi-Unicast Program
1.Open the HTML5 Toolbox Web-GUI and click Connect in the Menu Bar, then select Program Manager to launch the Program Manager panel.
2.Click the New Program symbol to open the wizard and then:
•Click in the text box to name the new program.
•Select Multi-unicast, or if you want to use an existing program as a template, select this option. Then click Next.

|
Important Note: When you decide to use an existing program as a template, the new program inherits all the settings of the template program and you can adjust these settings as required by continuing through the program wizard. |
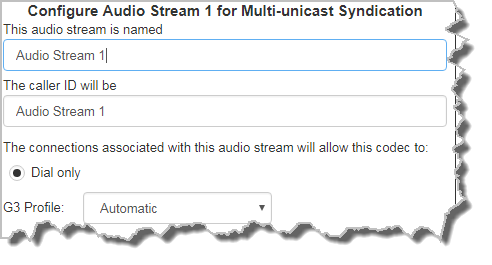
3.Enter a name for the Audio Stream and add a caller ID. Then click Next. Note: The caller ID is used to identify calls.
|
Important Note: The G3 profile setting supports maintaining specific G3 codec settings when answering a call from a G5 codec.
1.Automatic: The codec will dial the G3 codec and connect in mono or stereo. 2.Dual Program: This allows the codec to dial a G3 codec with a Dual Program profile loaded and support two simultaneous mono connections. 3.Runtime: The G3 codec will retain runtime settings when answering a call from a G5 codec. 4.Custom: The G3 codec will load a specified profile, e.g. profile 6, which is the first custom profile number. |
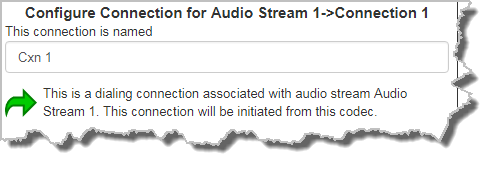
4.This audio stream connection in the wizard will allow the codec to dial. Enter the name of the connection in the text box, then click Next.
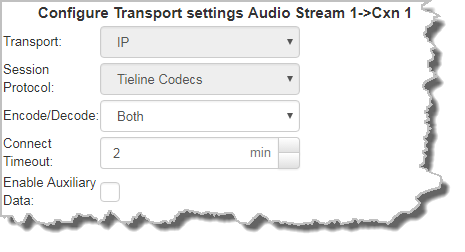
5.Follow the instructions on the right-hand side of the panel to configure the transport settings for the connection, then click Next. Note: only the first connection dialed in a multi-unicast program can encode and decode audio. All other connections are unidirectional and encode only.
|
Important Note: See RS232 Data Configuration for detailed information on RS232 data. Only in-band auxiliary data using the Music or MusicPLUS algorithms is possible when connecting to G3 Commander and i-Mix codecs. |
6.Configure the IP address, ports, and then specify which streaming interface is used to dial this connection, e.g. Primary (LAN / ETHERNET port and default setting) or VLAN if configured. Note: By default Any will select Primary.
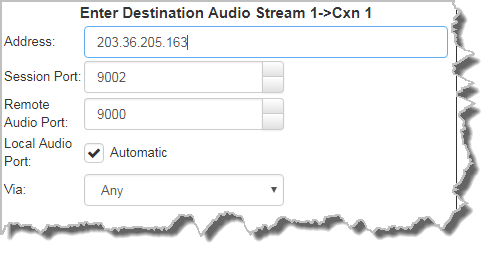
|
Important Notes: The Remote Audio Port is the codec port at the remote end of the link to which you are sending audio. The Local Audio Port is the port used by the local codec to receive audio from the remote codec. When Tieline Codecs is the Session Protocol selected (using Tieline session data), the Local Audio Port is automatically configured as UDP audio port 9000 by default. This is the default audio port used by all Tieline IP codecs for the first audio stream connection. Click to deselect the Automatic check-box to change this setting. |
Click Save Program to save the program with the default algorithm, jitter and FEC settings which are physically entered in the codec. Alternatively, click Next to specify individual algorithm, jitter buffer, FEC and auto reconnect settings for this audio stream (recommended).
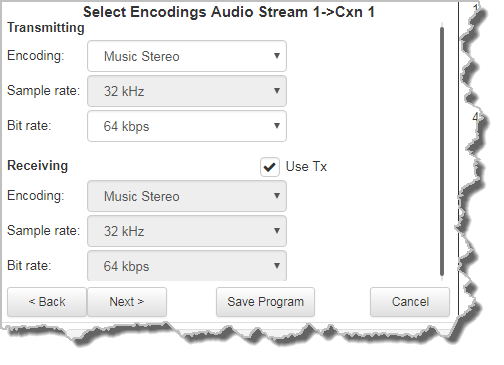
7.Click the drop-down arrows on the right-hand side of each text box to adjust the Encoding, Sample rate or Bit rate options.
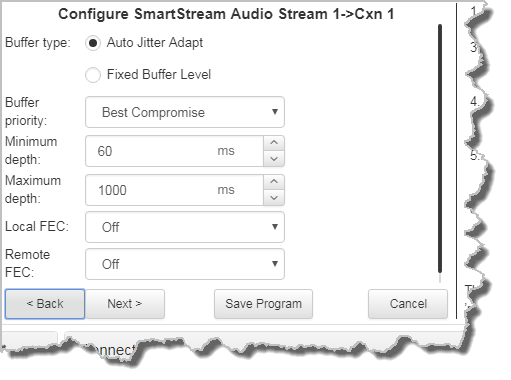
Click to configure:
•Auto Jitter Adapt and the preferred auto jitter setting using the drop-down arrow for Buffer priority. It is also possible to configure the Minimum depth and Maximum depth of jitter over the connection. See Configuring the Jitter Buffer for more details.
•Alternatively, select a Fixed Buffer Level and enter the Jitter Depth, which must be between 12ms and 5000ms depending on the algorithm you select.
•Local and Remote FEC settings if required.
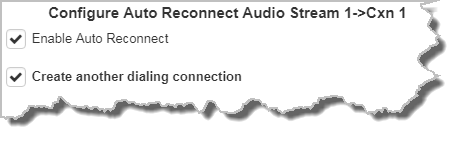
8.Select the Enable Auto Reconnect check-box if you want to enable this feature. This is enabled by default.
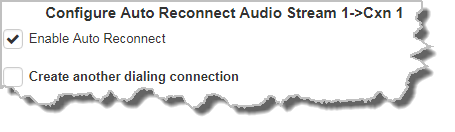
9.Select the Create another dialing connection check-box to configure a new connection for an additional endpoint, then click Next.
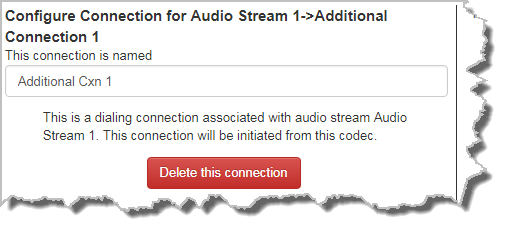
10.Enter the name of the second connection in the text box, then click Next.
11.Enter destination settings for the dialing connection.
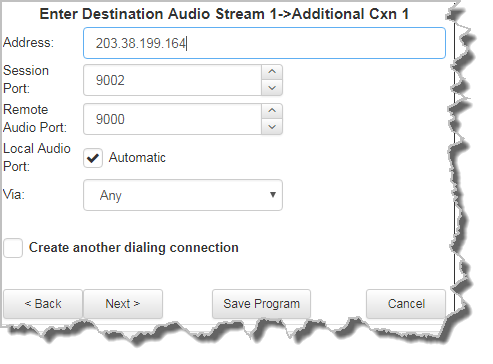
12.There are three options at this point:
•Select Create another dialing connection to dial another endpoint.
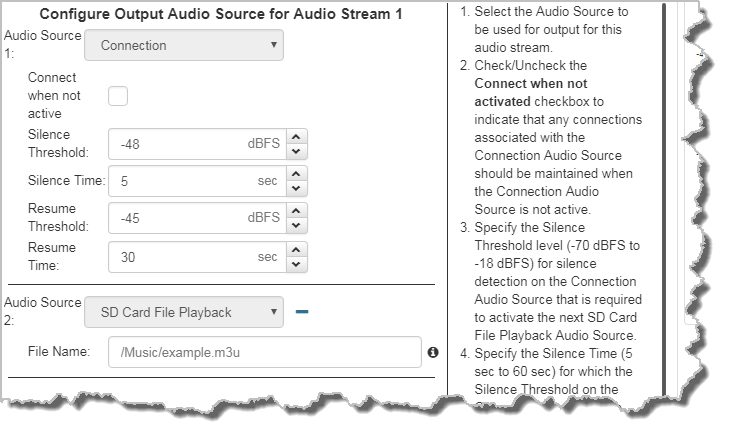
•Click Next to configure the Output Audio Source for the audio stream.
•Click Next Stream to configure the second multi-unicast audio stream.
Configuring SD Card File Playback Options
1.Click Next to configure SD card file playback using Output Audio Source configuration options to maintain program audio at transmitter sites.
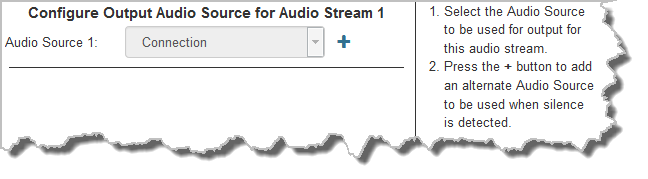
2.Click the blue Plus symbol  to add SD Card File Playback as an Output Audio Source. Click the Minus symbol
  to remove it. Follow the instructions on the right-hand side of the panel to configure silence and resume threshold parameters.
3.After configuring Output Audio Source options you can:
i.Click Save Program to save the program at this point.
ii.Click Next to configure rules options.
|
Important Notes for File Playback: •A single partition FAT32 formatted SDHC Card is required (SD cards may be less reliable and are not recommended). •Create MP2 or MP3 files using a 32kHz, 44.1kHz or 48kHz sample rate. •Ensure recordings used are not variable bit rate files. •SDHC file audio is not sent to codec encoders and cannot be transmitted via an audio stream to another codec. •File playback audio is sent directly to the codec outputs and therefore IGC is not available. When you create your MP2 or MP3 files ensure the audio levels match the audio reference level of your codec and that peaks average at the correct levels. •If you create a single file name ensure you add the file extension, e.g. "test.mp3", or the file will not play back. •If you create a directory name, all the files within the directory will be played back. We recommend you save all audio files as a playlist and link to this if you want them to play out sequentially. Please note that "M3U" is the playlist file format supported by the codec. |
Configuring Rules
1.To configure new rules click the drop-down arrow and select the preferred option from those available. Click the blue Plus symbol to add a new rule and click the Minus symbol to remove a rule.

|
Important Notes for Rules: •Rules for connecting or disconnecting an audio stream are configured in the Program Manager panel. Rules for connecting or disconnecting a program are configured in the Rules panel. •A non-WheatNet-IP Tieline codec can be configured to trigger a logic IO in a Tieline WheatNet-IP codec. Up to 64 logic IOs are available in Genie Distribution and Merlin PLUS WheatNet-IP codecs, as well as 4 physical CONTROL PORT GPIOs. •Connection-related rules are not displayed in Answer only programs. •Relay reflection is not available for SIP and Multicast Client programs. |
2.Click Save Program to complete configuration of the program.
3.Click Finish to exit the wizard.
4.The newly created program will be displayed in the left pane within the Program Manager panel and in the Program Loader panel. Select and connect audio streams in a program using the Connections panel, or dial the program manually using the codec front panel.
